


DIY Guides
Can You Make a Sectional Sofa Yourself? Four DIY Paths Explained
Yes, but DIY sectional sofa projects are not one task. Choose among rearranging verified modules, splitting a compatible sectional, sewing fitted slipcovers, or building from a complete plan.
On this page
Yes—you can make a sectional sofa yourself, but only after you define what “make” means. Rearranging verified modular sections is different from turning one sectional into two couches. Sewing removable slipcovers is different again, and building a new upholstered sectional from the ground up is a structural project that needs a complete project-specific plan. Choose one of those four paths first. Then confirm the exact product or plan supports it, complete the smallest reversible test, and stop if the project exposes unfinished sides, unstable bases, unknown load paths, mechanisms, wiring, or unsupported connections.

Choose the project before choosing tools
These four projects share a search phrase, not a construction method. Start from the object you actually have and the result you want:
| DIY path | Starting point | Intended result | Evidence required before work |
|---|---|---|---|
| Rearrange modules | Separately identifiable units | A different supported sectional layout | Exact module map, allowed layouts, connection or stabilization method, finished exposed faces |
| Split into two | A sectional that can be disconnected | Two independently complete seating groups | Finished end conditions, arms/backs/bases/feet, permitted independent use, room fit for both groups |
| Sew slipcovers | Compatible body and cushion surfaces | Fitted, removable textile covers | Surface map, attachment/closure limits, pattern material, fabric and sewing specifications |
| Build from plans | New materials—not an existing sofa | A new plan-matched sectional | Complete plan for the exact application plus applicable structural, finish, upholstery and compliance review |

A model that rearranges easily may still lack finished sides for two separate sofas. A removable cushion cover does not prove the body can be slipcovered without blocking a connector or mechanism. An outdoor wood plan does not become an indoor upholstered-furniture plan because both results are called sectionals. This is a decision route, not a universal construction plan; exact product instructions or a complete project-specific plan control the work.
Build the project record before changing anything
Start with a project record, not a shopping list. Record the manufacturer, exact model or plan revision, present configuration, intended result, room, and all instructions or labels you can retrieve. Photograph every face, base, foot, connector, cushion, mechanism, power component and current gap before separating or covering anything.
Then prepare the path-specific information:
- For rearranging: identify every module and all manufacturer-supported neighboring faces.
- For splitting: draw both proposed groups and mark how each exposed end, back, base and floor contact will finish.
- For slipcovers: map body panels, cushions, seams, closures, vents, controls, connectors and surfaces that must remain accessible.
- For building: obtain the complete plan, materials schedule, cut list, joinery, support details, cushions, finish system and required review—not a photo or partial sketch.
Clear enough space to lay out the present state and the intended state without blocking an exit. Keep labels, fasteners, pattern pieces and removed components tied to their exact locations. Decide the recovery route before starting: how will you return to the last verified state if the next step fails?
Path 1: Rearrange verified modular sections
This path is appropriate only when the product documentation treats the pieces as modules and supports the intended arrangement. A visible seam or a section that can be pushed apart is not enough.
- Photograph and label every module in the current layout. Mark orientation and neighboring faces without attaching anything that could damage the upholstery.
- Draw the destination layout from above. Use the exact outside dimensions of each piece and include doors, routes and tables.
- Check every new boundary. Confirm which sides may be exposed, which modules need arms or backs, and whether loose cushions still have an intended position.
- Disconnect only by the exact method. Do not drag connected pieces or infer a release direction. For connector identification and testing, use the model instructions with the sectional connection guide.
- Move one identified section at a time. Use only documented handling points; protect the floor and keep hardware with its module.
- Place and stabilize the destination layout. Re-engage connections or use the documented no-tool stabilization method for that product.
- Test each boundary before normal use. Check floor contact, module movement, gaps, cushion support, route clearance and any manufacturer-specified functional test.
The route is complete only when every module has an intended position, every new neighboring face is supported, and the arrangement passes the product’s connection or stability instructions. If the seller documents only the delivered layout, treat another arrangement as unverified until support confirms it.
Path 2: Turn one sectional into two complete seating groups
A clean separation line is not proof that each half is a finished sofa. The two-group project passes only when both proposed groups are independently complete. Audit each group as though the other one did not exist.
- End condition: Does every exposed side have an intended finished surface, arm or approved armless boundary?
- Back and seat support: Does every sitting position retain its designed back, deck and cushion support?
- Base and floor contact: Are all required feet, glides or continuous bases present in their specified locations?
- Connection boundary: Can unused hardware be left safely as documented, or does it create a protruding, snagging or release problem?
- Independent use: Does the exact product documentation permit that module or group to carry normal use without the missing neighbor?
- Room operation: Do both groups preserve doors, paths, tables and access to controls or sleeper/reclining mechanisms?
Do not add an improvised arm, leg, bracket, platform or connector to make an incomplete half look finished. Those changes can alter a load path or interfere with hidden components. When independent-use evidence is missing, return to the documented sectional layout or ask the manufacturer to confirm the exact module grouping in writing.
Path 3: Sew removable sectional slipcovers
This path covers removable textile covers, not permanent reupholstery. First confirm that adding a cover will not block ventilation, controls, recliner/sleeper movement, power components, connectors, labels, required gaps or removable-cushion closures. Do not staple, glue, cut or remove the original upholstery as part of this route.

Pattern the sectional as modules and cushions, not as one giant L:
- Make a surface inventory. Give every module, cushion, arm face, back, deck, boxing strip and closure its own identifier.
- Choose the wearing layout. Pattern the configuration used most often, while preserving access to connectors if reconfiguration remains a real task.
- Prototype before cutting final fabric. Use inexpensive pattern material to trace the three-dimensional surfaces, grain/direction, alignment points and openings.
- Add project-specific allowances. Seam, hem, closure, piping, pattern-repeat and fabric-behavior allowances come from the sewing pattern and fabric—not a generic sectional yardage figure.
- Sew and test one small complete unit. A loose cushion or simple module can reveal machine capacity, seam bulk, shrinkage risk, fit and removal problems before the whole set is cut.
- Fit remaining pieces in a recorded order. Mark left/right, front/back, module ID and cushion ID inside every cover.
The cover is complete when it installs and removes without damaging the original surface, sits at the intended seams without dangerous loose material, leaves every required control/opening/connector accessible, and passes the fabric’s exact care instructions. Stop if the test piece distorts the cushion, pulls on a mechanism, transfers color, snags the surface or cannot be removed as planned.
Path 4: Build only from a complete application-specific plan
A ground-up sectional is not simply several plywood boxes with cushions. The plan must define how the seating loads travel through the deck, rails, legs/base, back and module joints; how edges and fasteners are contained; how cushions are supported; how sections remain aligned; and which material, finish and intended-use conditions apply. Do not design the load path while cutting parts.
Use this sequence as a plan-control procedure, not a construction design:
- Confirm the plan names the same indoor or outdoor application, material system and finished configuration you intend to build.
- Check that the document includes every view, dimension, material specification, cut and hardware item, joinery step, assembly order, finish requirement and inspection point needed to complete it.
- Resolve missing or conflicting information with the plan author or a qualified professional before buying or cutting.
- Build a non-load-bearing layout mock-up when room fit or ergonomics are still uncertain; do not treat it as seating.
- Follow the exact plan revision and record any authorized clarification. Do not substitute materials, joinery or dimensions because another sectional looks similar.
- Complete every plan-specified inspection and any applicable qualified or compliance review before the object enters normal use.
Plan scope matters. The Western Red Cedar Lumber Association, for example, publishes a project specifically described as an outdoor Western Red Cedar sectional. That fact does not make its plan appropriate for an indoor upholstered sofa. In the United States, manufacturing, importing, selling or reupholstering covered upholstered furniture can also create requirements under federal upholstered-furniture rules. This article is not a compliance or testing procedure; identify the rules and qualified review that apply to the exact project and market.
Use the stop condition for your path
The correct stop condition depends on the path. Do not solve a failed branch by quietly switching to another kind of work.
| What you observe | Stop because | Recovery |
|---|---|---|
| New module faces do not align or stabilize naturally | The layout, orientation or connection may be unsupported | Return to the last documented layout; verify module IDs and exact instructions |
| Separated group exposes an unfinished base, missing foot, open hardware or unsupported end | It is not independently complete | Reconnect the original neighboring section; request written independent-use evidence |
| Slipcover blocks a control, vent, connector, mechanism or label | The cover changes access or operation | Remove the prototype; revise the pattern only within verified removable-cover scope |
| Pattern/fabric fit requires stapling, gluing or removing original upholstery | The project has crossed into reupholstery | Stop and obtain an exact reupholstery method and applicable qualified/compliance guidance |
| Build plan omits a load path, joint, dimension, material or inspection | The missing item is structural, not decorative | Pause before material substitution or cutting; obtain a complete clarification |
| A mechanism, wire, power component or hidden structure appears | The assumed scope is wrong | Do not cut, drill, fasten or cover it; return to the last reversible state and contact the manufacturer or qualified professional |
Return only to the last verified, reversible state. Photograph the mismatch and record the module, pattern piece or plan step. Do not force a connector, cut an exposed bracket, add a substitute foot, make an unapproved hole, or conceal the problem under fabric.
Verify the completed state—not just the appearance
A sectional project is finished when its specific promise is observable and the intended use no longer depends on a guess:
- Rearranged modular sectional: every piece has a documented role and orientation; supported boundaries, connections or no-tool stabilization pass; the layout works in the room.
- Two seating groups: each group independently has complete seating/back/base/floor-contact conditions and documented permitted use.
- Sectional slipcovers: every labeled cover fits, removes, preserves controls and mechanisms, and has a verified care route; no permanent upholstery change was made.
- Plan-built sectional: the exact plan is complete, every plan-specified inspection is passed, and applicable qualified/compliance review is complete before normal use.
Live with a reversible rearrangement or test cover long enough to operate doors, walk the main route, sit in every intended position and use documented mechanisms. A visually convincing result that shifts, exposes a missing boundary, blocks operation or lacks required evidence has not passed.
Current Monvane example: one verified DIY path
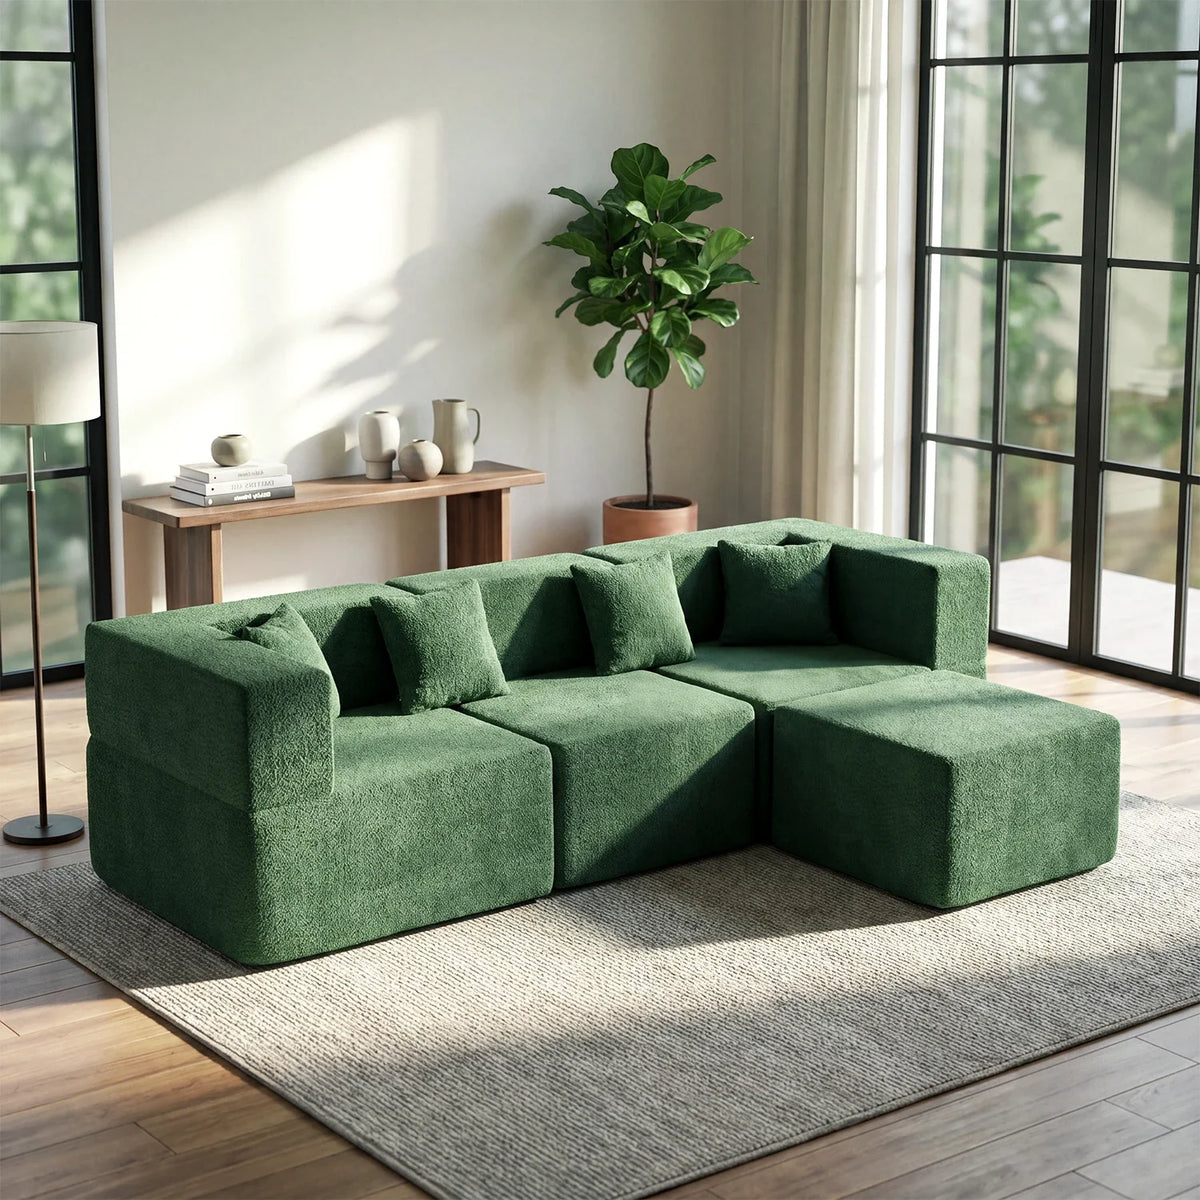
The current Monvane Cushioned Modular Sofa (4 Seats) page says its modular sections can be rearranged and that no tool-based assembly is required: unbox, position the sections and allow expansion. That is evidence for Path 1 only. The public page does not establish that the exact set becomes two independently complete sofas, accepts a custom slipcover, or provides a ground-up build plan.
For this set, begin with the exact delivered module inventory and current page/instructions. Confirm the desired arrangement and any exposed faces or stabilization details with the Monvane Support Center when the documentation does not show them. Do not use the product’s general modular wording as permission to add structure, alter upholstery or transfer an unrelated plan.
Sources and limits
Current Monvane product and support pages were checked August 13, 2026. US upholstered-furniture compliance boundaries were checked against current CPSC business guidance and 16 CFR part 1640; requirements depend on the actor, product, activity, date and market. The outdoor-plan example comes from the Western Red Cedar Lumber Association, and general pattern-first slipcover guidance comes from a published sewing project. None of those sources proves compatibility with a different product.
The answer is therefore conditional: make a sectional yourself only inside one supported path. Reconfigure documented modules, split only into independently complete groups, sew only compatible removable covers, or build only from a complete application-specific plan. If the exact evidence stops, the DIY project stops there too.